Ah, the joy of a sparkling clean car! But let’s be honest, those professional car washes can really add up, and sometimes they just don’t get into all the nooks and crannies like you’d like. Plus, there’s something deeply satisfying about getting your hands dirty and taking pride in the results of your hard work. It’s a zen-like process, from gathering your supplies to watching the grime wash away and revealing that showroom shine once again.
Think about it: you know your car best. You know where the bug splatter is most stubborn, where the dirt collects around the wheel wells, and which spots need that extra bit of elbow grease. A DIY car wash allows you to tailor the cleaning process to your vehicle’s specific needs, ensuring a truly thorough and personalized clean. You have complete control.
Beyond the personalized clean and the potential cost savings, washing your car at home is often more environmentally friendly. You can control the amount of water you use, opt for biodegradable soaps, and avoid the harsh chemicals that are sometimes used in commercial car washes. It’s a small step you can take towards a greener lifestyle.
But where do you even begin? What are the secrets to achieving that professional-quality shine in your own driveway? Don’t fret! We’ve compiled a list of insider secrets to help you get that professional result.
So, are you ready to ditch the drive-through and embrace the world of DIY car washing? Get ready to learn about **15 DIY Car Wash Tricks and Tips** that will transform your car washing routine and leave your vehicle looking its absolute best! We’re here to give you the ultimate guide, from choosing the right products to mastering the perfect drying technique. Keep reading to discover our essential **15 DIY Car Wash Tricks and Tips**.
Getting Started: Essential Supplies and Preparation
Gathering Your Arsenal: The Right Tools for the Job
Before you even think about getting your car wet, make sure you have all the necessary tools and supplies. This will save you time and frustration in the long run. Imagine getting halfway through washing your car only to realize you’re out of soap!
First and foremost, you’ll need two buckets. One for soapy water and one for rinsing. This prevents you from constantly dipping your dirty wash mitt back into the soapy water, contaminating it with grime and potentially scratching your paint. Think of it as a double-check against spreading dirt around.
Next, invest in a high-quality wash mitt made of microfiber or sheepskin. These materials are gentle on your car’s paint and effectively lift dirt away. Avoid using old sponges or towels, as they can trap dirt and cause scratches.
You’ll also need a car wash soap specifically designed for automotive finishes. Avoid using dish soap, as it can strip away the protective wax coating on your car’s paint. Look for a pH-balanced soap that is gentle yet effective at removing dirt and grime.
Finally, grab a hose with a spray nozzle, a drying towel (again, microfiber is best), and some wheel cleaner. With these essentials in hand, you’re ready to tackle even the dirtiest car! And don’t forget the importance of the little things like window cleaner and tire shine.
Prepping for Success: Location, Location, Location
Choosing the right location to wash your car is just as important as having the right tools. Avoid washing your car in direct sunlight, as the sun can cause the soap to dry too quickly, leaving behind water spots.
Ideally, you’ll want to wash your car in a shaded area or on a cloudy day. This will give you more time to work and prevent the soap from drying before you can rinse it off.
Also, consider the surface you’ll be washing your car on. Avoid washing your car on gravel or dirt, as this can kick up debris and scratch your paint. A paved driveway or concrete slab is ideal.
Before you start washing, make sure to close all the windows and doors tightly to prevent water from getting inside. Remove any loose items from the car, such as floor mats and trash.
Giving your car a quick rinse with the hose before applying soap is also a good idea. This will help to loosen any dirt or debris that is stuck to the surface, making it easier to wash away.
The Washing Process: From Top to Bottom
The Two-Bucket Method: A Game Changer
We touched on this earlier, but it’s worth emphasizing: the two-bucket method is crucial for preventing scratches. Fill one bucket with clean water and the other with soapy water.
Dip your wash mitt into the soapy water, then wash a small section of your car. After washing each section, rinse the mitt thoroughly in the clean water bucket before dipping it back into the soapy water.
This ensures that you’re always washing with a clean mitt and prevents you from transferring dirt and grime back onto your car’s paint. It’s a simple technique but has very noticeable long term effect.
This method might seem tedious at first, but it’s well worth the effort in the long run. You’ll be amazed at how much cleaner your car looks and how much less likely it is to get scratched.
For particularly dirty areas, you may even consider using a third bucket with a dedicated grime-fighting solution. Think of it as your heavy-duty weapon against stubborn messes!
Top-Down Approach: Preventing Streaks and Spots
Always wash your car from top to bottom. This prevents dirty water from running down onto already clean sections of your car.
Start with the roof, then work your way down to the hood, doors, and finally the lower panels. This will ensure that you’re always working with clean water and soap.
When washing each section, use overlapping strokes and apply gentle pressure. Avoid scrubbing too hard, as this can scratch your paint.
Pay special attention to areas that tend to accumulate dirt and grime, such as the wheel wells, bumpers, and side mirrors.
Rinse each section thoroughly with the hose before moving on to the next one. This will prevent the soap from drying and leaving behind water spots.
Wheel and Tire TLC: The Dirtiest Job of All
Wheels and tires tend to be the dirtiest parts of your car, so it’s best to tackle them last. This prevents you from transferring dirt and grime from the wheels to the rest of your car.
Use a dedicated wheel cleaner to remove brake dust, road grime, and other contaminants. Follow the instructions on the product label carefully.
Apply the wheel cleaner to each wheel and let it sit for a few minutes before scrubbing with a wheel brush. Pay special attention to the lug nuts and other hard-to-reach areas.
Rinse the wheels thoroughly with the hose and then move on to the tires. Use a tire brush to scrub the tires with soap and water.
Finally, apply a tire shine product to give your tires a clean and glossy look. Be sure to wipe off any excess tire shine to prevent it from splattering onto your car’s paint.
Drying and Detailing: The Finishing Touches
The Microfiber Magic: Preventing Water Spots
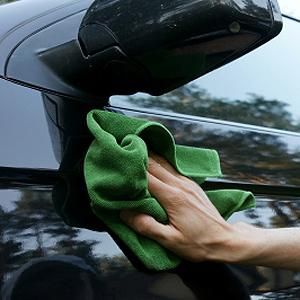
Drying your car properly is essential for preventing water spots and streaks. The best way to dry your car is with a microfiber drying towel.
Microfiber towels are incredibly absorbent and gentle on your car’s paint. Avoid using old bath towels or other abrasive materials, as they can scratch your paint.
Start by blotting the water off your car with the drying towel. Then, use a sweeping motion to remove any remaining water.
Pay special attention to areas that tend to trap water, such as the door jambs, mirrors, and trim. Open the doors and trunk to dry these areas thoroughly.
For a truly spotless finish, consider using a leaf blower to blow away any remaining water droplets. This will help to prevent water spots from forming, especially in those hard-to-reach areas.
Window Wonder: Streak-Free Glass
Clean windows are essential for safe driving and a polished look. Use a dedicated glass cleaner and a microfiber cloth to clean your car’s windows.
Spray the glass cleaner onto the windows and then wipe them down with the microfiber cloth. Use a separate, clean microfiber cloth to buff the windows dry.
Pay special attention to the corners and edges of the windows, as these areas tend to accumulate dirt and grime.
For stubborn streaks or spots, try using a mixture of vinegar and water. This is a natural and effective way to clean your car’s windows.
Don’t forget the inside of your windows! Interior windows often collect dust and fingerprints, so be sure to give them a good cleaning as well.
The Interior Sparkle: Cleaning Inside Out
Don’t forget about the interior of your car! A clean interior is just as important as a clean exterior.
Start by vacuuming the seats, carpets, and floor mats. Use a crevice tool to reach into tight spaces and remove any crumbs or debris.
Wipe down the dashboard, console, and door panels with a damp cloth and a mild cleaning solution. Avoid using harsh chemicals, as they can damage the interior surfaces.
Clean the windows with a glass cleaner and a microfiber cloth. Don’t forget to clean the rearview mirror as well.
Finally, freshen up the interior with an air freshener. A clean and fresh-smelling interior will make your car feel like new! Also consider leather cleaning and conditioning products for the seats.
Waxing and Protecting: Long-Term Care
The Importance of Waxing: Protecting Your Investment
Waxing your car is essential for protecting the paint from the elements. Wax creates a protective barrier that shields the paint from UV rays, dirt, and grime.
Waxing also gives your car a glossy, showroom-worthy shine. It enhances the color and depth of your car’s paint.
There are many different types of car wax available, so choose one that is appropriate for your car’s paint. Carnauba wax is a classic choice that provides a deep, warm shine. Synthetic waxes are more durable and offer longer-lasting protection.
Apply the wax to your car according to the instructions on the product label. Use a clean applicator pad and apply the wax in thin, even coats.
Let the wax dry according to the instructions on the product label. Then, buff the wax off with a clean microfiber cloth. Be sure to use a circular motion and apply a little bit of pressure when buffing. This step, when done properly, will extend the life of your paint.
Sealants and Coatings: Advanced Protection
For even longer-lasting protection, consider using a paint sealant or ceramic coating. These products offer superior protection against the elements and can last for several months or even years.
Paint sealants are synthetic polymers that bond to your car’s paint and create a durable protective layer. They are more durable than waxes and offer better protection against UV rays, acid rain, and bird droppings.
Ceramic coatings are even more advanced. They are made of liquid polymers that form a hard, glass-like layer on your car’s paint. Ceramic coatings offer the ultimate in protection and durability.
Applying a paint sealant or ceramic coating requires some skill and preparation. It’s best to have these products professionally applied.
While these are great advanced protection options for your paint, be sure you research the products before using them. It’s important to consider the products you’re using, and how they will react to the paint on your car.
Special Situations: Dealing with Stubborn Dirt and Grime
Bug Off: Removing Insect Splatter
Bug splatter can be difficult to remove, especially if it’s been left on your car for a long time. The best way to remove bug splatter is to use a dedicated bug remover product.
Spray the bug remover onto the affected areas and let it sit for a few minutes before wiping it off with a microfiber cloth. You may need to repeat this process several times to remove all the bug splatter.
For stubborn bug splatter, try using a bug sponge or a clay bar. These tools can help to gently remove the bug splatter without scratching your paint.
Preventative maintenance is key! Consider applying a bug shield to the front of your car to prevent bug splatter from sticking in the first place.
If you use your vehicle often, it’s likely that you’ve found yourself driving into a swarm of bugs, so keep your vehicle protected and clean of bug splatter to avoid any permanent damage.
Tree Sap Troubles: A Sticky Situation
Tree sap is another common problem that can be difficult to remove. The best way to remove tree sap is to use a tree sap remover product.
Spray the tree sap remover onto the affected areas and let it sit for a few minutes before wiping it off with a microfiber cloth. You may need to repeat this process several times to remove all the tree sap.
For stubborn tree sap, try using a clay bar. A clay bar can help to gently remove the tree sap without scratching your paint.
You can also try using rubbing alcohol to remove tree sap. Wet a microfiber cloth with rubbing alcohol and then gently rub the affected areas.
One little-known trick: believe it or not, mayonnaise can work wonders for removing tree sap! The oils in mayonnaise help to break down the sap, making it easier to wipe away.
Bird Droppings: Acting Fast is Key
Bird droppings are highly acidic and can damage your car’s paint if left on for too long. It’s important to remove bird droppings as soon as possible.
The best way to remove bird droppings is to use a bird dropping remover product. Spray the bird dropping remover onto the affected areas and let it sit for a few minutes before wiping it off with a microfiber cloth.
For stubborn bird droppings, try using a clay bar. A clay bar can help to gently remove the bird droppings without scratching your paint.
You can also try using a mixture of baking soda and water. Make a paste of baking soda and water and then apply it to the bird droppings. Let it sit for a few minutes before wiping it off with a microfiber cloth.
If you can’t get to a bird dropping right away, at least try to blot it with a wet cloth to prevent it from hardening and causing more damage. The quicker you act, the easier it will be to remove.
Conclusion
So there you have it! **15 DIY Car Wash Tricks and Tips** to keep your ride looking its best without breaking the bank. From the essential two-bucket method to tackling stubborn tree sap, we’ve covered all the bases. Now, armed with this knowledge, you can confidently approach your next car wash with the skills and techniques of a seasoned pro.
Remember, consistency is key. Regular washing and waxing will not only keep your car looking great but also protect its paint from the harsh elements. It’s an investment in your vehicle’s long-term value and appearance.
And don’t be afraid to experiment! Try different products and techniques to find what works best for you and your car. The world of car detailing is vast and ever-evolving, so there’s always something new to learn. We hope these **15 DIY Car Wash Tricks and Tips** are useful and provide you with the best tips for keeping your car looking its absolute best!
Ready for more car care wisdom? Be sure to check out our other articles on topics like interior detailing, headlight restoration, and choosing the right car care products. Happy washing!